

The scrappy strippy chevron is nearly complete. I’ve raided the scrap bin, curated the colors, and got all the blocks made. If you’ve missed those posts, here’s the first one to get started.
All the blocks are made, it’s time to sew them together. I began by sewing the lengthwise rows one at a time.
When you flip the blocks right sides together, it’s important to line them so that WHERE YOU WILL SEW is where they match up, not at the edge. The scissors are pointing to the sewing line.

All of these connecting seams are bias cuts, so it’s really important not to stretch and distort them. If one seams to be a smidge longer than the other, better to ease in the longer one in, than to stretch the shorter one out. The tip of a seam ripper is great for easing in a tiny bit of fullness under the presser foot as you’re sewing.
Sew a whole row together before pressing. This picture illustrates my very favorite ironing tool – a rectangular surface to press on. Mine is a very simple one that rests on my traditional ironing board. You can see how having the long, straight side enables me to easily press a long, straight line of pieces accurately. Remember, ALL these seams are on the bias, so they are super easy to stretch out of shape. Press each one toward the background fabric, and steam well. Let the whole strip cool before lifting and moving it.
I’m a great believer in time-saving piecing, so I stacked each row, and then sewed the whole thing from end to end. You can see how I stacked them above, but of course it’s critical to pick up the stack and keep it facing the same direction when you go to your sewing machine. Then simply pick up the top two pieces, flip the top one to the left over the first one, and sew. Shift left, and flip the third piece over, and so on.

Once all the rows are sewn, it’s easy to put them together. All the seams will now nest together, and you can press to either side. Remember that there is still excess length on many of the rows.
And finally, trim both ends of the quilt nice and straight.
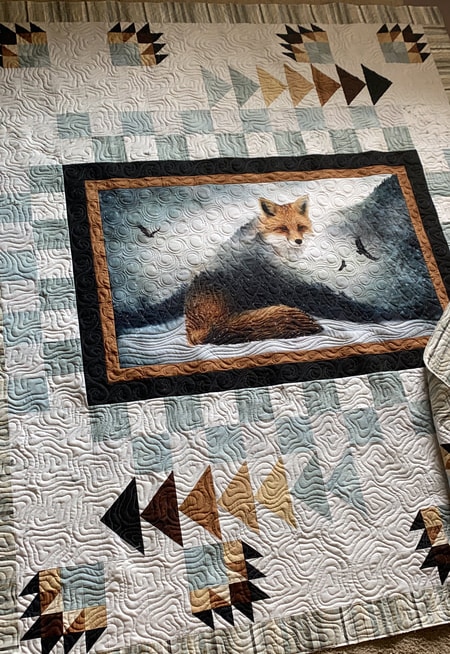
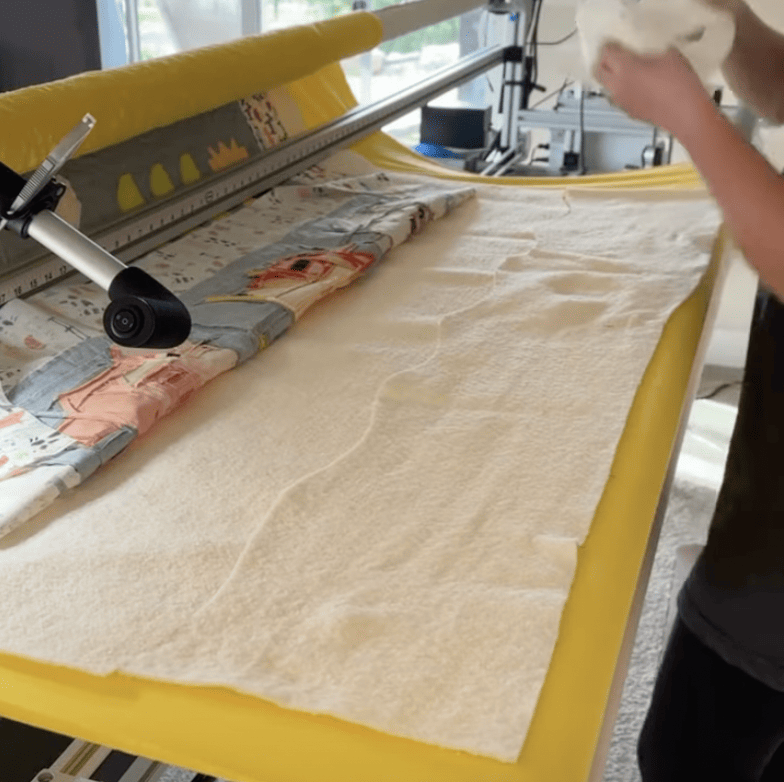
Apparently I’m a poor picture-taker and I missed getting any shots of the entire quilt top at this stage. But up next is the quilting, and here it is, locked and loaded.
Next week I’ll chat about quilting this one, and also about straight line quilting in general, and the many reasons I think it is SO wonderful.
See you then!
Susan


Comments +